

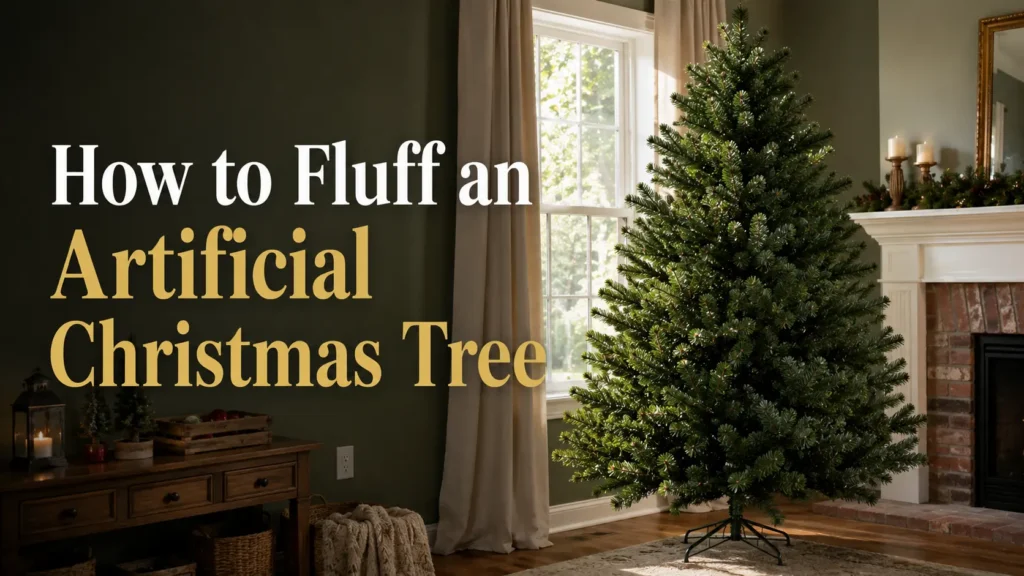
You bring home a beautiful artificial Christmas tree, slide it out of the box, set it up, and step back expecting holiday magic. Instead, you get something that looks more like a half-deflated green umbrella than the lush, full tree pictured on the packaging. The branches are flat, the gaps show the metal pole, and the whole thing looks sad and sparse. Before you decide you bought a bad tree, here is the truth professional decorators know: that tree is not flawed, it just has not been fluffed.
Fluffing is the single most important and most overlooked step in setting up an artificial Christmas tree. It is the difference between a tree that looks cheap and fake and one that looks full, realistic, and expensive, regardless of what you paid for it. The disappointing flat tree and the gorgeous showpiece are often the exact same tree, separated only by the time and technique someone put into shaping the branches.
This guide walks through the entire fluffing process from unboxing to the finished, decorated tree, including the professional techniques that create depth and realism, the common mistakes that keep trees looking flat, and how to make even an affordable tree look premium. For more decorating and tree resources, you can explore the full library at MyChristmasTrees.online.
By the end, you will know exactly how to fluff an artificial Christmas tree so it looks its absolute best, how long to budget for it, and how to make the job easier every year afterward.
How Do You Fluff an Artificial Christmas Tree?
You fluff an artificial Christmas tree by assembling it correctly, then systematically shaping every branch from the bottom up so the foliage spreads out, fills the gaps, and creates a natural, three-dimensional silhouette. The process transforms the compressed shape the tree arrives in into the full, realistic form you want.
The core steps are simple in principle. Assemble the tree section by section and let the branches settle. Start fluffing at the bottom and work upward, completing one section before moving higher. Separate every branch by bending the main limbs outward and upward. Spread each individual tip, fanning the smaller offshoots in different directions to break up the flat plane. Rotate and angle branches naturally so the tree does not look symmetrical or sparse. Finally, fill any visible gaps before you add a single light or ornament.
| Fluffing Step | Purpose |
|---|---|
| Assemble correctly | Stable base, branches in position |
| Start from the bottom | Logical, thorough coverage |
| Separate every branch | Builds volume and density |
| Spread every tip | Creates realism and depth |
| Rotate branches naturally | Avoids a flat, fake look |
| Fill gaps before decorating | Hides the pole, completes the shape |
Done patiently, this process makes any artificial tree look dramatically fuller. Skipped or rushed, even an expensive tree looks thin and artificial. Fluffing is genuinely the highest-impact thing you can do for your tree’s appearance.
Why Artificial Trees Need Fluffing
To fluff effectively, it helps to understand why artificial trees arrive looking so flat in the first place. The problem is built into how they are made, packaged, and stored.
Artificial trees are designed to collapse down to a fraction of their displayed size so they can fit in a manageable box. To achieve that, the branches are pressed tightly against the central pole during manufacturing and packaging. Months of sitting compressed in a box, often stacked under other boxes in a warehouse, flattens the branches even further and trains them to hold that squashed position.
This is sometimes called branch memory. The materials used for the foliage, typically PVC for the bulk of the branches and sometimes more realistic PE molded tips on premium trees, hold whatever shape they are left in. Straight out of the box, that shape is compressed and one-directional, with branches pointing down and inward and tips bunched together.
Fluffing reverses all of this. By physically bending the branches back out, separating the tips, and angling everything into a natural spread, you restore the tree to its intended full form. The PVC and PE hold the new shape just as readily as they held the compressed one, which is exactly why a few hours of careful fluffing can make such a dramatic difference. You are not adding anything to the tree; you are simply releasing the fullness that was packed away.
Before You Start
A little preparation makes fluffing faster, more comfortable, and more effective. Gather what you need and set up your space before you begin, because once you are elbow-deep in branches you will not want to stop and hunt for supplies.
Here is a preparation checklist:
- Gloves. PVC branch tips can be sharp and rough on bare hands. A sturdy pair of work or gardening gloves protects your fingers and lets you work longer without irritation.
- Good lighting. You need to see the gaps and the pole clearly. Bright, even lighting helps you spot thin areas you would otherwise miss.
- Enough floor space. Give yourself room to walk all the way around the tree, since you will be circling it repeatedly.
- The tree stand. Have it ready and on a level surface so the tree is stable while you work.
- A ladder or step stool. Essential for fluffing the upper sections of taller trees safely without overreaching.
- The branch diagram or instructions, if included. Some trees come with a guide to branch assembly and shaping that is worth a quick look.
How long fluffing takes depends heavily on the size and quality of the tree, since larger trees simply have more branches to shape. Set realistic expectations so you do not rush, because rushing is the enemy of a good result.
| Tree Size | Approximate Branches | Typical Fluffing Time |
|---|---|---|
| 5 ft | Fewer, lighter | 45 minutes to 1 hour |
| 6 ft | Moderate | 1 to 1.5 hours |
| 7 ft | Many | 1.5 to 2 hours |
| 7.5 ft | Many | 2 to 2.5 hours |
| 8 ft | Numerous | 2.5 to 3 hours |
| 9 ft | Very many | 3 to 4 hours |
| 10 ft | Most | 4 hours or more |
These are first-year estimates. With practice and good storage, fluffing gets faster in subsequent years, but the first time is always the most time-consuming because the branches are at their most compressed.
Step 1: Assemble the Tree Correctly
A well-fluffed tree starts with proper assembly. Getting this foundation right makes everything that follows easier and ensures the tree is stable and correctly shaped before you shape the branches.
Most artificial trees come in three or more sections that stack onto a central pole, with a color-coded or labeled system indicating the order. Assemble from the bottom section up, seating each section firmly onto the one below so the poles connect securely. A loose connection leads to a wobbly, leaning tree, so make sure each joint is snug.
Trees use one of two branch systems. Hinged trees have branches permanently attached to the pole that fold down for storage and swing out into position, which is the more common and convenient design. Hook branches, found on some older or budget trees, are separate pieces you insert individually into the pole, usually sorted by size. If you have a hook tree, follow the size labeling carefully so the largest branches go at the bottom and the smallest at the top.
Once assembled, check stability before fluffing. The tree should stand straight and feel secure in its stand. Common assembly mistakes include sections seated in the wrong order, poles not fully connected, the tree leaning because the stand is on an uneven surface, and branches not folded fully down into their natural starting position before fluffing. Take a moment to correct any of these now, because fixing a leaning or misassembled tree after it is fully fluffed and decorated is a frustrating job.
Let the branches relax for a bit after assembly if you have time. Some decorators assemble the tree and leave it overnight so gravity begins pulling the branches down, giving you a small head start on the fluffing.
Step 2: Fluff From the Bottom Up
With the tree assembled and stable, the actual fluffing begins, and professionals always start at the bottom. There is good reason for this approach.
Working from the bottom up is more thorough and more comfortable. The lower branches are the densest and most visible, anchoring the tree’s full appearance, so giving them careful attention sets the tone. Practically, fluffing lower sections first means you are not reaching over already-fluffed branches and crushing them as you work higher. It keeps your completed work undisturbed.
The key discipline is to work one section at a time and finish it completely before moving up. Resist the urge to skip around the tree randomly, which leads to missed branches and uneven density. Instead, treat each tier as its own project: fully shape every branch in the bottom section, then move to the next tier up, and so on to the top.
Within each section, work branch by branch in a methodical way, perhaps circling the tree as you go so you cover all sides evenly. For example, on the bottom tier, take the first main branch, shape it fully as described in the next steps, then move to the adjacent branch, continuing around and inward until every branch in that tier is done. Only then do you climb to the next level.
This systematic approach prevents the most common fluffing failure, which is a tree that is dense in some spots and bare in others because the work was done haphazardly. Patience and method are what separate a professional result from an amateur one.
Step 3: Separate Every Branch Tip
This is where the real transformation happens. Separating and spreading the individual branch tips is the technique that creates fullness, depth, and realism, and it is the step most homeowners shortchange.
Each main branch on an artificial tree has a central limb with numerous smaller offshoots, and those offshoots each end in clusters of tips. Out of the box, these are all pressed together pointing the same direction. Your job is to fan them out so they occupy three-dimensional space.
Start with the main branch limb, bending it upward and outward away from the pole. Real evergreen branches angle up toward the light rather than drooping, so mimicking that upward angle instantly looks more natural. Then work the offshoots, bending them in varied directions, some up, some down, some left, some right, so they spread rather than clump. Finally, separate the individual tip clusters, splaying them apart so they catch light and fill space.
The professional secret here is to avoid symmetry and embrace randomness. A branch where every tip points the same way looks fake. A branch where tips fan unevenly in multiple directions, with some reaching forward and others tucked back, reads as natural and full. Nature is not symmetrical, so deliberately introducing variation is what creates realism. Vary the depth too, pulling some tips outward toward the viewer and pushing others inward toward the trunk, which builds the sense of depth that flat, surface-only fluffing never achieves.
This is tedious, and on a full-size tree it is the bulk of your fluffing time, but it is also where the magic is. A tree whose every tip has been individually separated and angled looks twice as full as the same tree with branches merely bent outward as a block.
Step 4: Rotate Branches for a Natural Shape
Beyond shaping individual tips, the way you position whole branches relative to one another shapes the tree’s overall silhouette and realism. Thoughtful branch rotation fills gaps and breaks up the artificial uniformity.
Think about the different positions branches occupy. Forward-facing branches reach toward the room and create the front face of the tree. Side branches fill the width. Rear branches, often neglected, matter if any part of the tree is visible from behind or even just to give the tree honest depth. As you fluff, rotate and angle branches so they distribute evenly around the pole rather than all crowding the front.
The most important task here is filling empty areas. As you work, you will see gaps where the central pole shows through or where branches leave a thin spot. Rotate nearby branches to cover these openings, pulling a branch from a denser area across to span a gap, or angling an adjacent branch to fill the hole. This is how professionals eliminate the dreaded pole-showing-through look that screams artificial.
Randomness again is your friend. If every branch sits at the same angle and the same spacing, the tree looks manufactured. By rotating branches to slightly different positions, varying their angles, and staggering their spread, you create the irregular, organic appearance of a real tree. A little controlled chaos in branch positioning reads as natural fullness to the eye.
Pay attention to the transitions between sections too. The seams where one tier meets the next are common gap zones, so make sure branches from the upper section drape down slightly to blend with the section below, hiding the join and creating a continuous, seamless profile.
Step 5: Check the Tree From Every Angle
Fluffing is not finished when you have touched every branch; it is finished when the tree looks full from every vantage point people will see it. This final shaping step catches the gaps you miss while focused up close.
Walk all the way around the tree slowly, examining it from each side. A spot that looks full from one angle may reveal a glaring gap from another. Circle it more than once, since fresh angles catch fresh problems.
Look at the tree from eye level, the height from which most people will view it when standing near it. Then step back and look from across the room, which is how guests will most often see it. Distance reveals the overall silhouette and any large thin areas or unevenness that are hard to notice up close. A tree can look acceptable when you are right next to it and still appear lopsided or gappy from ten feet away.
As you spot issues, fill the visible gaps by rotating and spreading nearby branches. Keep adjusting until the tree presents a full, even, natural profile from the front, the sides, and across the room. If the tree sits against a wall or in a corner, you can focus your effort on the visible faces, but do not entirely neglect the back, as some depth there improves the overall look.
This step is what elevates a good fluffing job to a great one. The extra ten or fifteen minutes spent walking around and perfecting the silhouette pays off every single day the tree is up.
How Long Does It Take to Fluff a Tree?
One of the most common questions is simply how much time to set aside, because underestimating it is what leads people to rush and end up with a flat tree. Fluffing time scales with tree size and, to a degree, quality, since denser premium trees have more branches to shape.
| Tree Size | First-Year Fluffing | Subsequent Years (Well Stored) |
|---|---|---|
| 5 ft | 45 min to 1 hr | 30 to 45 min |
| 6 ft | 1 to 1.5 hrs | 45 min to 1 hr |
| 7 ft | 1.5 to 2 hrs | 1 to 1.5 hrs |
| 7.5 ft | 2 to 2.5 hrs | 1 to 1.75 hrs |
| 8 ft | 2.5 to 3 hrs | 1.5 to 2 hrs |
| 9 ft | 3 to 4 hrs | 2 to 2.5 hrs |
| 10 ft | 4+ hrs | 2.5 to 3 hrs |
The first year always takes longest because the branches are tightly compressed from shipping and have never been shaped. In later years, if you store the tree well, the branches retain much of their fluffed shape, cutting your time significantly. Quality matters too: a budget tree with sparse branches fluffs faster simply because there is less to work with, while a dense, realistic premium tree takes longer but rewards the effort with a far better appearance.
The practical advice is to set aside a generous block of time, put on some music or a holiday movie, and treat fluffing as part of the seasonal ritual rather than a chore to rush through. The time you invest is repaid in weeks of a beautiful tree.
Common Fluffing Mistakes
Even with good intentions, several recurring mistakes keep trees looking flat and fake. Knowing them helps you avoid them.
Rushing the job. Fluffing well takes time, and trying to finish a nine-foot tree in twenty minutes guarantees a sparse result. The fix is to budget adequate time and work methodically.
Skipping the inner branches. Many people fluff only the outer tips and ignore the branches close to the pole. Empty interior branches make the tree look hollow and thin. The fix is to shape the inner branches too, which adds depth and helps hide the pole.
Leaving branches flat. Bending a branch outward as a single flat plane, without separating the individual tips, leaves it looking like a green paddle. The fix is to fan every tip in multiple directions for true volume.
Making branches perfectly symmetrical. Uniform, evenly spaced branches all at the same angle look manufactured. The fix is to introduce randomness in angle, spacing, and direction for a natural appearance.
Decorating before fluffing. Adding lights or ornaments to an unfluffed tree means you cannot properly shape the branches afterward, locking in the flat look. The fix is to always complete fluffing before any decorating.
Ignoring the back branches. Neglecting the rear of the tree leaves it looking thin and unfinished, and undermines its depth even from the front. The fix is to give the back at least basic shaping unless it is flush against a wall.
| Mistake | Result | The Fix |
|---|---|---|
| Rushing | Sparse, flat tree | Budget proper time |
| Skipping inner branches | Hollow, thin look | Shape interior branches |
| Leaving branches flat | Paddle-like, fake | Fan every tip |
| Perfect symmetry | Manufactured look | Add natural randomness |
| Decorating first | Locked-in flatness | Fluff completely first |
| Ignoring the back | Thin, unfinished | Shape the rear too |
How to Make an Artificial Tree Look More Realistic
Fluffing builds the foundation, but a few additional techniques take an artificial tree from merely full to genuinely realistic and high-end. These layer on top of good fluffing to complete the illusion.
Decorate in depth rather than only on the surface. Placing some ornaments deep inside the tree near the trunk creates the impression that the foliage continues back into shadow, which reads as realistic depth. Layered lighting, with strands wrapped deep into the interior as well as near the tips, gives the tree an inner glow that flat surface lighting cannot match. Mixing ornament sizes, from large statement pieces to small fillers, creates visual rhythm that mimics how a naturally decorated tree looks.
Ribbon adds volume and movement that fills space between branches, while picks and faux greenery sprays tucked into gaps blend with the foliage and make an artificial tree look lusher and more natural. Maintaining natural, slightly irregular spacing rather than rigidly even placement reinforces the organic feel.
All of these realism techniques build on a properly fluffed tree, and our complete guide on how to decorate a Christmas tree to look full walks through layering lights, ribbon, ornaments, and fillers in detail. Fluffing gives you the canvas; these decorating techniques are the paint that completes a realistic, expensive-looking tree.
Choosing the Right Artificial Tree
If you are still shopping or considering an upgrade, the tree you choose affects how good it can look after fluffing and how much realism is achievable. Understanding the key differences helps you buy wisely.
The biggest distinction is branch material. PVC trees, the most common and affordable, use flat strips of plastic cut into needle shapes, which look good when well fluffed but read as artificial up close. PE trees use molded plastic tips that replicate the three-dimensional shape of real needles, looking far more realistic, especially near the front of the tree. Many premium trees are mixed-tip trees, combining realistic PE tips on the outer, visible branches with cheaper PVC filler deeper inside, balancing realism and cost.
Branch construction matters too. Hinged branches, attached permanently and folding for storage, are far more convenient than hook branches that must be inserted individually, and they speed up assembly and fluffing every year. Pre-lit trees come with lights already installed, saving you the lighting step, and our guide on how to choose the perfect pre-lit Christmas tree covers what to look for in branch density, tip count, and light quality. For a deeper dive into everything pre-lit, the ultimate guide to pre-lit Christmas trees covers buying, decorating, and maintaining them.
Flocked trees, coated in artificial snow, have a built-in fullness advantage because the flocking visually fills gaps between branches, and they require slightly gentler fluffing to avoid shedding the coating. Our guide to flocked Christmas trees explains how to handle and decorate them. Whatever you choose, a higher tip count and denser branches give you more material to work with and a fuller result after fluffing.
Lighting After Fluffing
Once your tree is fully fluffed, and only then, it is time for lights. The order matters enormously, and getting it right is one of the most important sequencing rules in tree setup.
Always complete fluffing before adding lights. If you light an unfluffed tree, you trap the branches in their flat position and cannot shape them properly afterward without disturbing the lights. Fluffing first gives you a full canvas to light, and the lights settle naturally into the shaped branches.
For the fullest, most professional glow, layer your lighting. Wrap lights along each major branch from the trunk outward and back, burying some deep in the interior so the tree glows from within, and running others closer to the tips for surface sparkle. This depth lighting is what makes a tree look rich rather than flatly lit. LED lights are the modern recommendation because they run cool, last longer, and use far less energy, which matters on a tree you will run for hours daily.
For the complete fundamentals of bulb types, layering, and technique, our Christmas tree lights and lighting guide covers everything. To master the wrapping method that professionals use for even, deep coverage, our guide on how to wrap lights like a professional walks through the technique step by step. To figure out how many lights your tree needs, the targets in how many lights do you need for a Christmas tree give clear benchmarks, and you can calculate the exact number with the Christmas tree light calculator.
Decorating a Fully Fluffed Tree
With the tree fluffed and lit, the fun part arrives: decorating. A well-fluffed, well-lit tree is the perfect foundation, and now the ornaments, ribbon, and finishing touches bring it to life.
Layer ornaments in depth, placing some deep near the trunk, some in the mid-branches, and your showpieces on the outer tips, mixing large, medium, and small sizes for balance and rhythm. Add ribbon in cascading or wrapped patterns to fill vertical space and add movement. Tuck in picks and floral sprays to close any remaining gaps and add texture. Crown the tree with a topper proportional to its size, and finish with a tree skirt or collar to ground the design and hide the stand.
For inspiration on building a cohesive, beautiful look, our complete guide to Christmas tree decoration styles and themes covers palettes and design approaches. To get the right quantity of ornaments for your tree size, the Christmas tree ornament calculator gives you a target instantly, and to plan ribbon and other decorations in proportion, the Christmas tree decoration calculator helps you avoid over- or under-decorating. A fully fluffed tree holds all of these elements beautifully, which is exactly why the fluffing comes first.
Fluffing Different Tree Styles
The basic fluffing technique stays the same across trees, but the emphasis shifts depending on the tree’s shape and purpose. Adapting your approach to the style gets the best result from each.
Full traditional trees have the most branches and the most depth, so they get the complete treatment with attention to all sides and thorough interior shaping. Slim trees are narrower, so the focus shifts to maximizing their apparent fullness by spreading tips outward and emphasizing the front and sides, since there is less depth to work with. Pencil trees, the slimmest of all, need careful tip separation to make the most of their limited width, with every branch spread to its fullest to avoid a sparse, stick-like look.
Corner trees, often flat on one side, let you concentrate fluffing on the visible front and sides while doing minimal work on the back that faces the corner. Tabletop trees are small and quick to fluff, but because they are viewed up close, careful tip separation matters proportionally more to avoid an obviously sparse look.
For decorating and choosing narrow trees, our guide to slim and pencil Christmas trees for small spaces covers maximizing their impact. If you are working with tight quarters generally, our guide to small-space and apartment Christmas trees helps with selection and styling, and for the smallest setups, our roundup of the best tabletop Christmas trees for small spaces covers compact options that still look full when properly shaped.
Artificial Trees vs Real Trees
Fluffing is unique to artificial trees, which naturally raises the question of how they compare to real trees overall. Each has clear trade-offs worth understanding.
Artificial trees require upfront assembly and fluffing but then need no watering, no cleanup of fallen needles, and can be reused for many years, making them convenient and economical over time. Real trees need no fluffing and offer authentic scent and appearance straight away, but they require watering, shed needles, and last only a single season before disposal. In appearance, a well-fluffed premium artificial tree can look remarkably realistic, while a real tree offers genuine natural texture and fragrance no artificial tree fully replicates.
For a complete side-by-side breakdown across cost, convenience, and appearance, our detailed comparison of real vs artificial Christmas trees covers every angle. To understand the long-term value of an artificial tree, our guide on how long artificial Christmas trees last explains lifespan expectations, and if environmental impact matters to you, our look at whether artificial Christmas trees are eco-friendly provides useful context. The relevant point for fluffing is simply that the effort you put into shaping an artificial tree is what unlocks the realistic appearance that makes it competitive with a real one.
Storage Tips to Reduce Next Year’s Fluffing Time
The time you spend fluffing this year can be dramatically reduced next year with smart storage. How you put the tree away determines how compressed and tangled the branches become before the next season.
Use a proper storage bag or container rather than cramming the tree back into its original box, which often crushes the branches. A quality storage bag, especially one sized to hold the tree with branches only loosely folded, protects the foliage and keeps it from being flattened. Some decorators use upright storage bags or rolling stands that let the tree be stored standing with branches relatively intact, which preserves their shape best and minimizes next year’s fluffing.
When disassembling, fold the hinged branches up gently rather than forcing them, and avoid over-compressing the sections. Protecting the branches during storage means they keep more of their fluffed shape, so you start ahead next year. Climate control helps too: storing the tree in a stable, dry environment rather than a damp basement or a sweltering attic prevents damage to the branches, lights, and any flocking over the years.
A few minutes of care when packing the tree away saves you significant fluffing time the following December, and it extends the tree’s useful life. Treating storage as part of the fluffing cycle is something experienced decorators do automatically.
Recommendations
Professional decorators spend far more time fluffing than most homeowners expect, and that single fact explains why their trees look so much better. The pros understand that a high-quality artificial tree is only as impressive as the time spent shaping every branch, and they treat fluffing as the foundation of the entire display rather than a chore to rush.
The most encouraging part is that this levels the playing field. Even an affordable tree can look premium when each branch tip is carefully positioned to create depth, fullness, and a natural silhouette. Conversely, an expensive tree fluffed carelessly will disappoint. The technique matters more than the price tag, which means a beautiful tree is within reach of anyone willing to invest the time.
What we would recommend is to embrace fluffing as part of your holiday ritual rather than resenting it. Set aside an unhurried block of time, work methodically from the bottom up, separate every tip, and walk around the tree to perfect the silhouette. Then store the tree well so the job gets easier each year. Do this, and your tree will look fuller and more realistic than trees costing far more, every single season.
Final Verdict: How Do You Fluff an Artificial Christmas Tree?
You fluff an artificial Christmas tree by assembling it correctly and stably, then systematically shaping the branches from the bottom up, completing one section before moving higher. For each branch, you bend the main limb outward and upward, separate and fan every individual tip in multiple directions to build volume and depth, and rotate branches to fill gaps and avoid an artificial symmetry. You then walk around the tree, checking it from eye level and across the room, filling any visible gaps until it presents a full, natural silhouette from every angle. Only after fluffing is complete do you add lights and decorations.
The whole process rewards patience over speed. Budget adequate time for your tree’s size, work methodically, and resist rushing. The difference between a flat, fake-looking tree and a full, realistic, expensive-looking one is almost entirely the fluffing.
Conclusion
A beautiful artificial Christmas tree is not something you buy so much as something you create, and fluffing is the heart of that creation. Starting with correct assembly, working from the bottom up, separating every branch tip, rotating branches for a natural shape, and checking the tree from every angle, you transform a flat, compressed shape into a full, realistic showpiece.
From there, lighting after fluffing and decorating a fully shaped tree complete the look, while smart storage preserves your work and shrinks next year’s effort. None of it requires special talent, only patience and method. Whether your tree was a bargain or a splurge, the time you invest in carefully positioning every branch is what makes it look professional. Put in that effort, and you will step back to admire a tree that genuinely looks like it belongs in a magazine, created entirely by your own hands.
Frequently Asked Questions
How do you fluff an artificial Christmas tree? Assemble the tree correctly and stably, then shape the branches from the bottom up, finishing one section before moving higher. Bend each main branch outward and upward, fan every individual tip in different directions for depth, and rotate branches to fill gaps. Walk around the tree checking from all angles, filling thin spots until it looks full everywhere. Fluff completely before adding lights.
Why does my artificial Christmas tree look flat and sparse? It almost certainly has not been fully fluffed. Artificial trees ship tightly compressed, and the branches hold that flat shape until you physically bend them out and separate the tips. A flat tree is rarely a defective tree; it just needs the branches shaped and the individual tips fanned out to reveal its fullness.
How long does it take to fluff a Christmas tree? It depends on size and quality. A small 5-foot tree takes about 45 minutes to an hour, a 7.5-foot tree takes 2 to 2.5 hours, and a 9- or 10-foot tree can take 3 to 4 hours or more the first year. Subsequent years go faster if you store the tree well, since the branches retain much of their shape.
Should I fluff the tree before or after adding lights? Always fluff before adding lights. If you light an unfluffed tree, you trap the branches in their flat position and cannot shape them properly afterward without disturbing the lights. Fluffing first gives you a full, shaped canvas, and the lights then settle naturally into the branches for a better result.
How do I make a cheap artificial tree look expensive? Fluff it thoroughly, separating every tip for maximum fullness, then light it generously with layered lighting wrapped deep into the interior. Add ribbon, mix ornament sizes, tuck in greenery picks to fill gaps, and keep a cohesive color theme. Careful technique makes an inexpensive tree look premium far more than the tree’s price does.
Do you really need to fluff an artificial tree every year? Yes, though how much depends on storage. Each time the tree is folded and stored, the branches compress somewhat, so they need reshaping when you set it up again. Good storage in a proper bag, ideally with branches loosely folded or stored upright, minimizes the compression and reduces the fluffing needed each year.
What is branch memory and why does it matter? Branch memory refers to how the PVC and PE materials in artificial branches hold whatever shape they are left in. Compressed in a box for months, branches “remember” that flat position. Fluffing works precisely because the same materials will just as readily hold the new, spread-out shape you bend them into.
How do I fluff the inside branches near the pole? Reach in and shape the interior branches just as you do the outer ones, bending them outward and separating their tips. Fluffing the inner branches is essential because it adds depth and helps hide the central pole. Skipping them leaves the tree looking hollow and thin even if the outer branches are well shaped.
Do pre-lit trees still need fluffing? Yes. Pre-lit trees come with lights installed, which saves the lighting step, but the branches still ship compressed and must be fluffed. Shape the branches gently around the attached lights, taking care not to pull or stress the wiring, and you will get the same full, realistic result as with an unlit tree.
How do I fluff a slim or pencil tree? Use the same tip-separation technique, but focus on spreading every branch to its fullest to maximize the limited width, emphasizing the front and sides. Because slim and pencil trees have less depth, careful fanning of each tip matters even more to avoid a sparse, stick-like appearance. Every branch should be spread out fully.
Will fluffing damage my tree or the branches? No, fluffing is exactly what the branches are designed for. Bending and shaping the limbs and tips is normal and will not harm a properly made tree. Just wear gloves to protect your hands from sharp PVC tips, and on flocked trees, work gently to avoid shedding the snow coating. The branches are meant to be shaped season after season.
How should I store my tree to make fluffing easier next year? Use a proper storage bag rather than cramming the tree into its original box, which crushes the branches. Fold hinged branches up gently without over-compressing, and if possible use an upright storage bag or stand that keeps branches relatively intact. Store in a dry, climate-stable space. Well-stored trees keep much of their shape, cutting next year’s fluffing time.